Mark images and change them selectively
Paint over areas and say what should happen there — the rest of the image stays as it is.
Often an image is almost right: only the colour of the mug is wrong, the logo is positioned badly, there’s something unnecessary in the background. Instead of starting over, you mark the spot and describe the change.
- 1
Open mark
Hover over a generated image and click «QMark«Q. In the large view there’s also the button — this works for uploaded photos too.
- 2
Paint over areas
Choose a colour (red, green, blue or yellow) and a stroke width and paint over the spot. For multiple changes, use a different colour for each area. Undo with Ctrl+Z or the button.
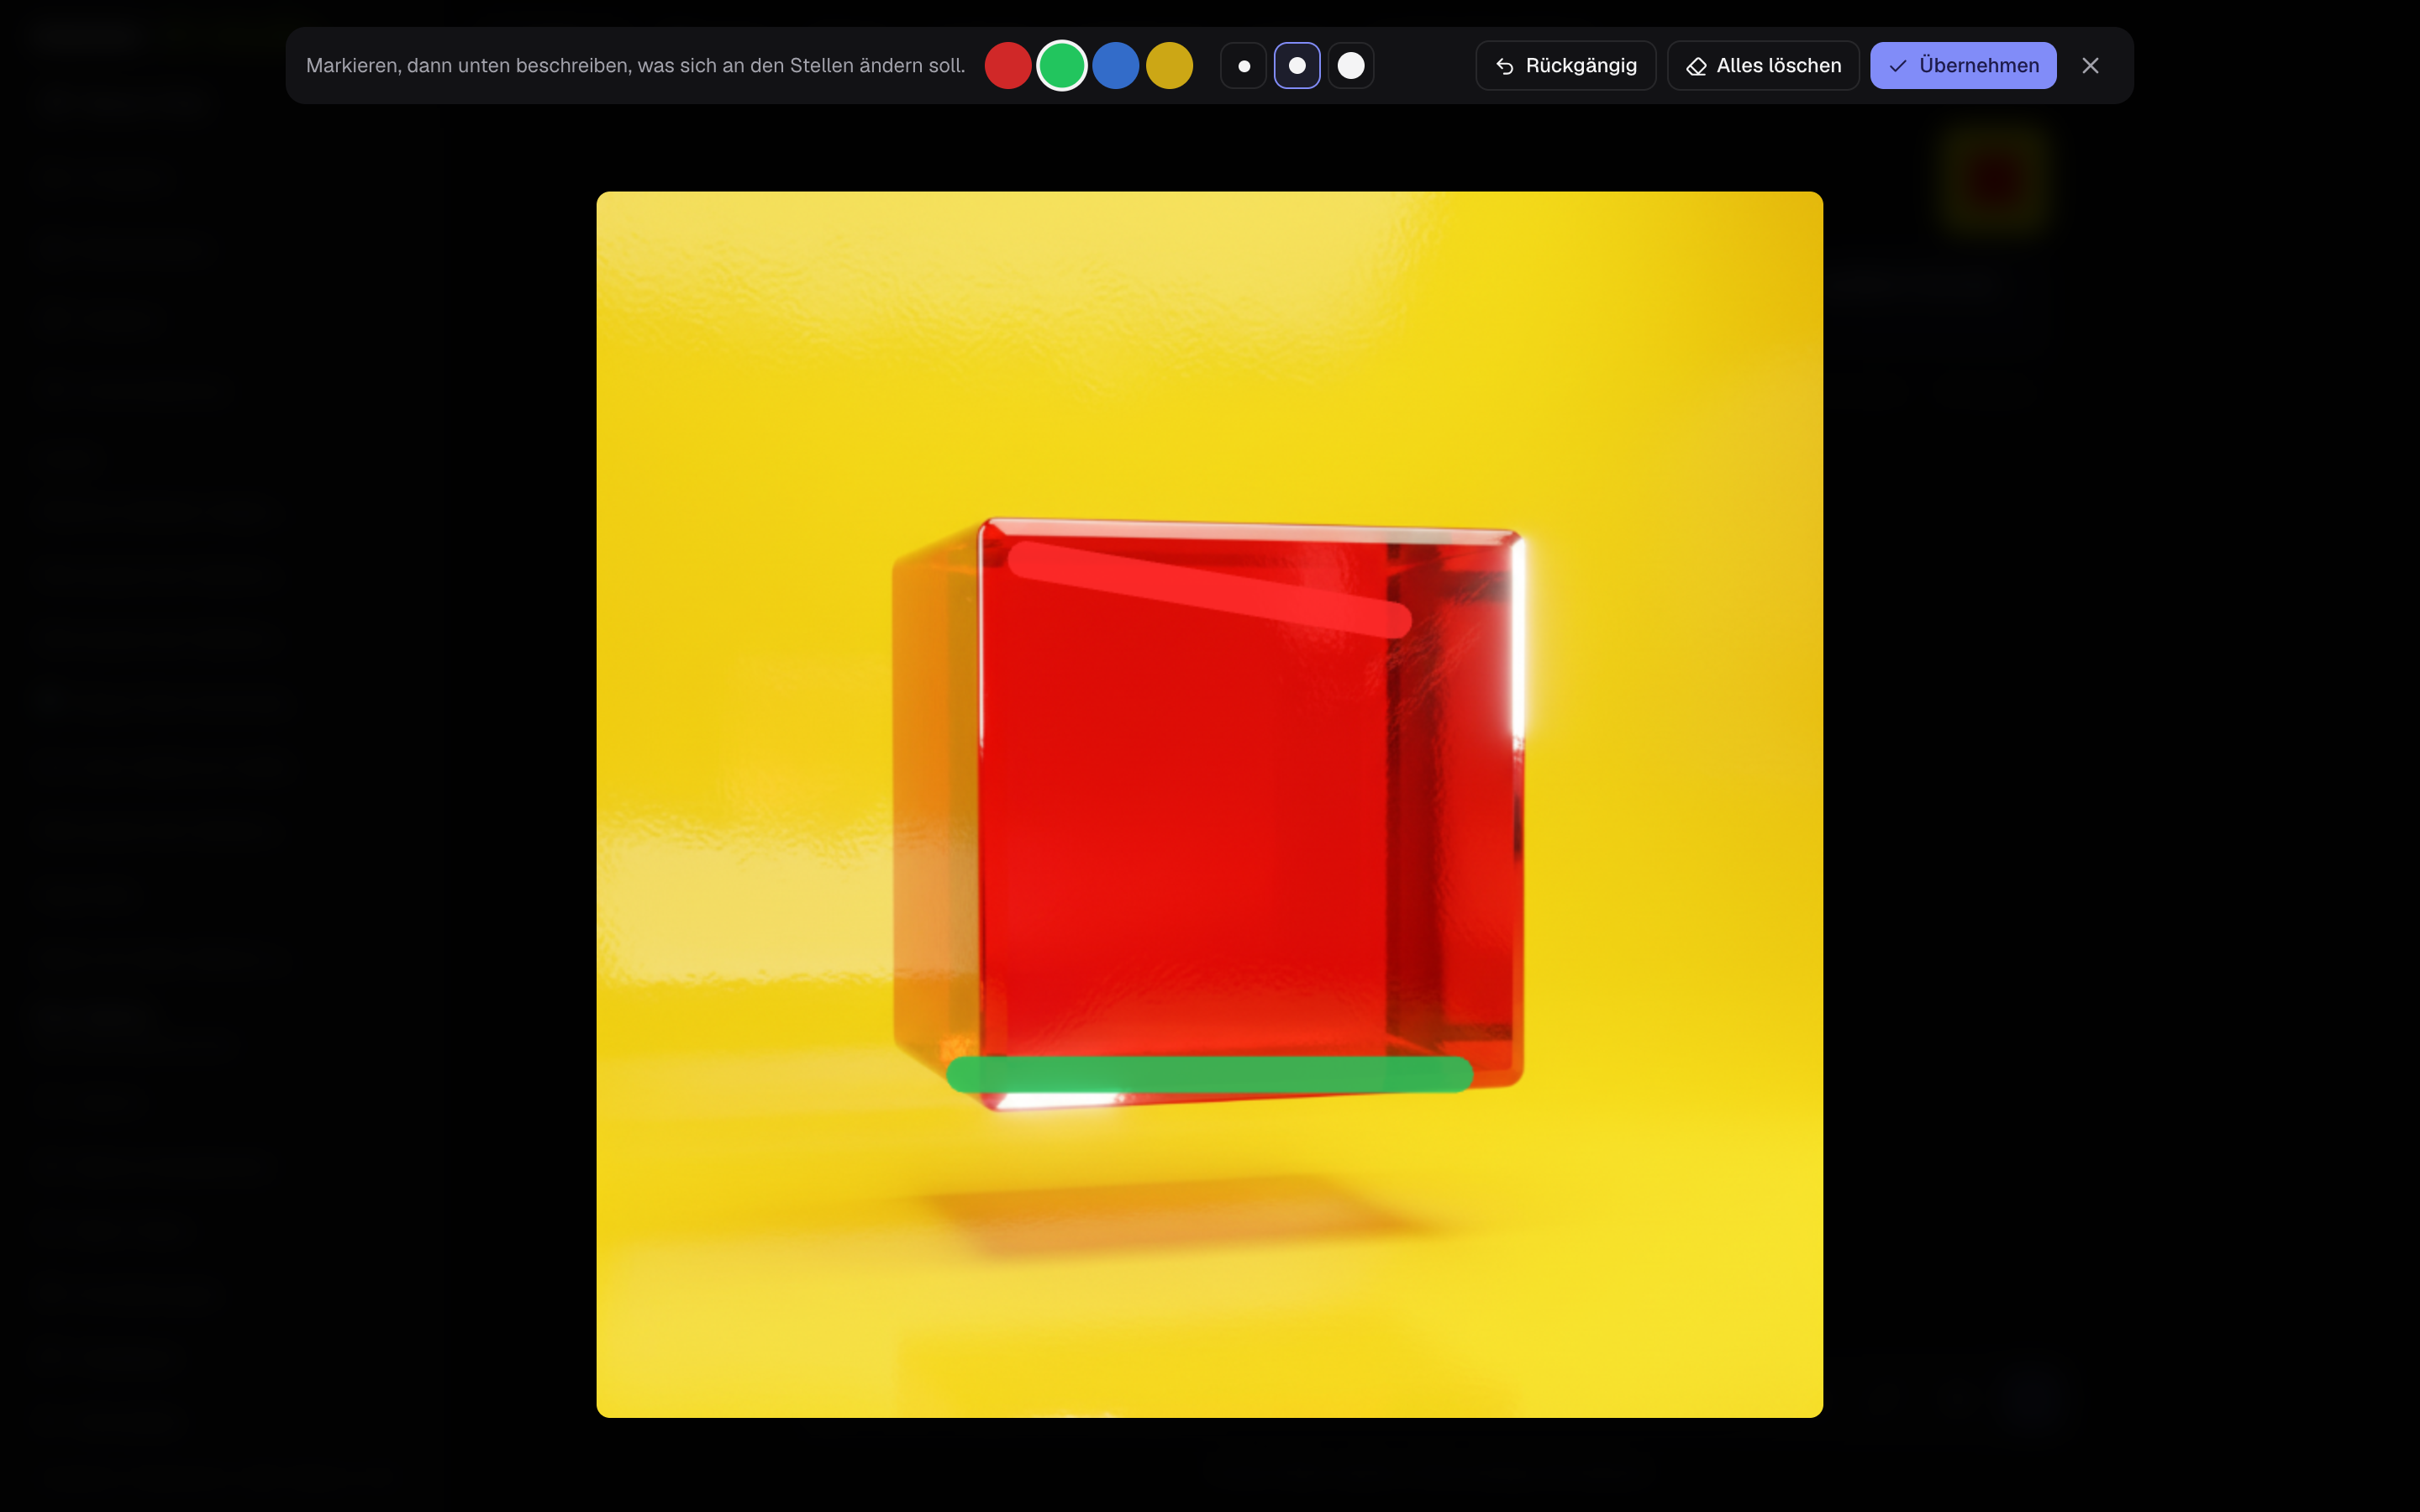
- 3
Apply and describe
«QApply«Q attaches the marked image as a template and writes the instruction in advance: one line per colour «QThe red marked area: …«Q. Add what should happen, such as «Qinto a window with a sea view«Q or «Qremove«Q, and send.
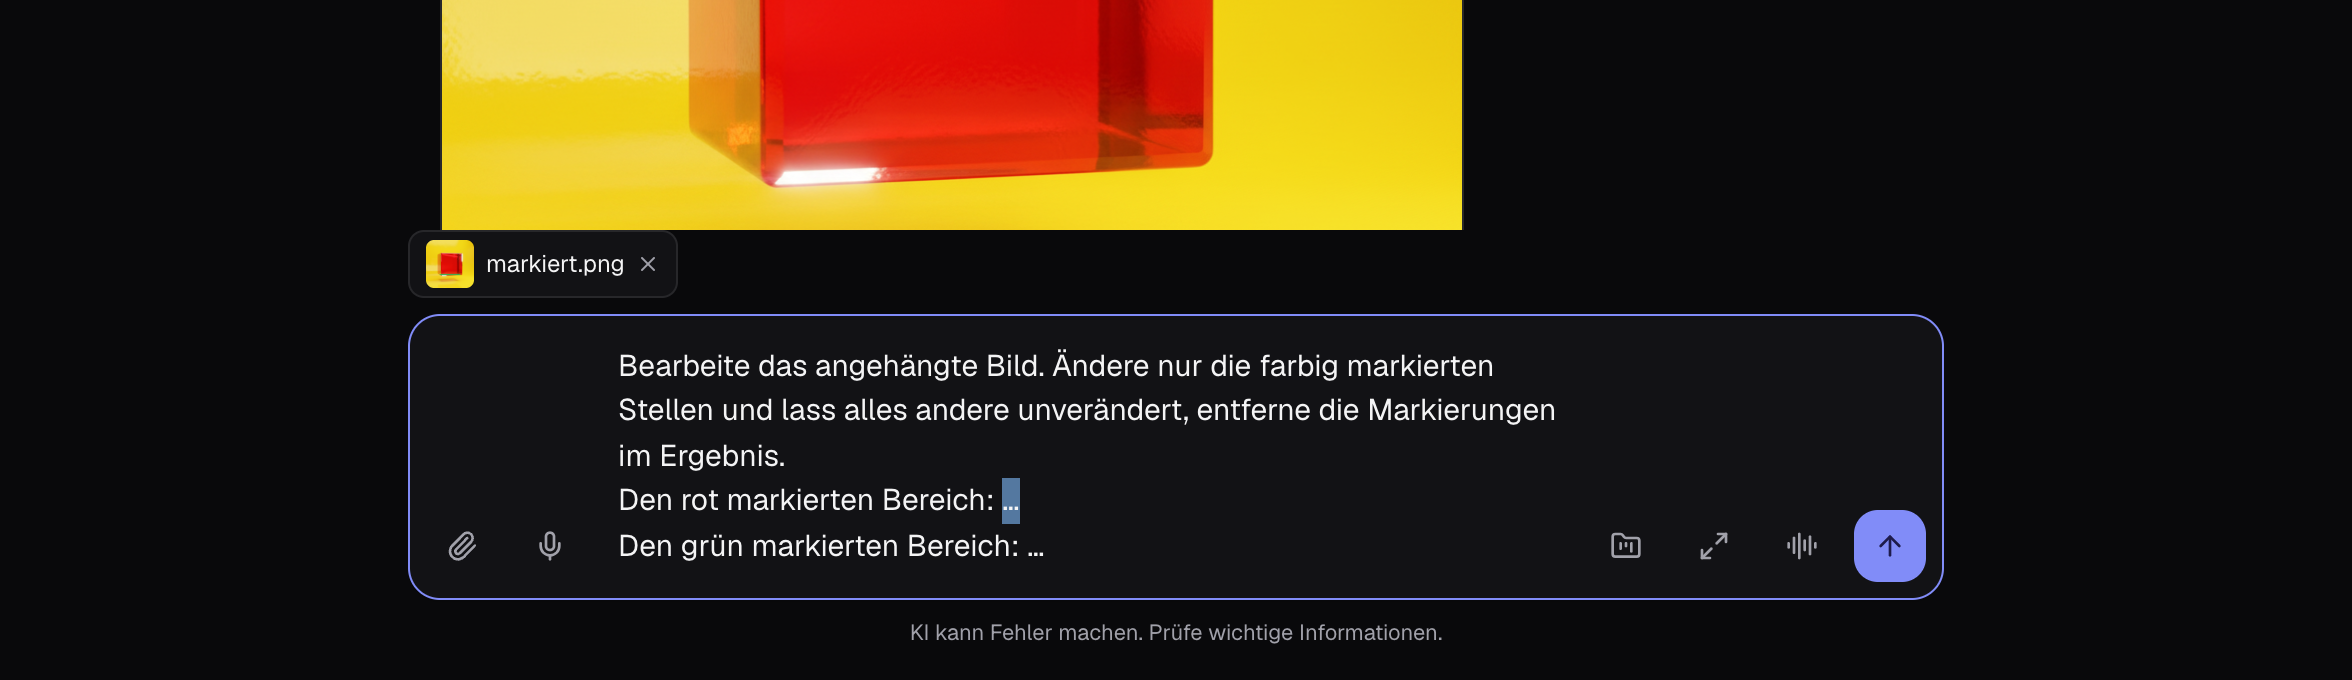
- 4
Check result
The model only changes the marked areas and removes the markings. If some of the strokes remain visible, write «Qagain, remove markings completely«Q — with the result as a template.
Tips
- Marking requires a model that understands images as input. In image mode, the studio automatically switches to Nano Banana Pro.
- For pure style changes («Qmake it a pencil drawing«Q) you don’t need marking — «QTemplate«Q is enough.
- For people and faces: your own photos yes, other people only with their consent.
Cost: Like a normal image from the chosen model, usually 4 to 15 cents.